I’m not sure if there’s a Virtual Assistant in existence that doesn’t use Canva. The Swiss Army Knife of online design tools, Canva has more features than you can shake a stick at. Because Canva is a Virtual Assistant’s BFF, I thought I’d tell you how I personally use it and point out a few handy features you may not be aware of.
I should start by saying this going to be quite a lengthy post so I’m going to have to assume you already know what Canva is and are familiar with the basic features.
This would be the longest post in existence if I explained how to use it from scratch so if you’re not familiar with Canva, my advice is to sign up for a free account and play around with it first.
Why Canva is brilliant for Virtual Assistants
In addition to being reliable, user-friendly and fun to use, I think the most remarkable thing about Canva is that you can do so many things with it.
For example, you can use it to:
- Create social media images and infographics.
- Resize images into different formats.
- Generate colour palettes.
- Understand and choose colour theory using their colour wheel.
- Build a website or stand-alone landing page (yes, really!).
- Design business presentations.
- Create invoices and proposals.
- Visualise ideas using whiteboards.
- Share and record your screen.
- Edit and retouch photos and videos – including removing the background – which is HUGE.
- Convert videos to MP4.
- Create designs for physical products such as journals, calendars, stickers, bags, bookmarks, notebooks, mugs, magnets, sweatshirts, hoodies and T-shirts.
- Design digital products such as planners, eBooks and guides.
- Create print products such as flyers, brochures, postcards, invitations, business cards, menus, calendars, posters and gift certificates.
- Create computer, tablet and mobile mockups.
- Design email signatures.
- Design a logo.
You can just do so freakin’ much with it!
Also, I don’t know if it’s just me but creating stuff in Canva is definitely one of my favourite things. My VA helps me with a number of tasks but I can tell you that Canva design is definitely not one of them.
Why I upgraded to the paid version of Canva
The free version of Canva is pretty good but the paid version is phenomenal.
Although I initially baulked at the price and stuck with the free version for quite some time, Canva gradually added new features until upgrading was a no-brainer.
When I first started my VA business I didn’t want to spend any money and always tried to find free versions. But as I explain in my post on the platforms, apps and tools I pay for (and which ones I don’t), I came to realise that many paid platforms and tools are an investment.
After a while, I discovered that spending a little money now saved me a huge amount of time, money and mental energy in the long run.
This can seem like an alien concept to new Virtual Assistants. But just as you want clients to invest in hiring a VA to save time, money and energy, the same thinking applies to your business as well.
So first I upgraded to Canva Pro and then I switched to Canva For Teams.
I only opted for Teams because I have my own VA now though and I also wanted to grant access to the graphic designer I sometimes use. I don’t think you need the Teams subscription yourself.
I think Canva Pro is the most suitable option for Virtual Assistants – the annual subscription also works out far cheaper than paying monthly.
Top Canva tips for Virtual Assistants
As mentioned, you can do a shed-load of things with Canva but here are some of my favourite features. Some of these you may be familiar with, but I hope many will be new to you.
Copy and paste an image from a website straight onto a design
Say there’s an image you want to add to a design (a photo of you from your own website, for example), you don’t need to save it to your desktop and then upload it to Canva, you can just copy and paste it straight on the design.
To use: right-click the image you want to use, select Copy, go to your Canva design, right-click and paste it in.
Drag and drop images onto a design
A variation on the above tip, instead of uploading an image and then adding it to a design, you can simply drag one from your desktop or a folder instead.
Copy and paste from one design to another
Because resizing one design into another format (a Facebook post into an email header, for example) often results in a bit of a mess, I normally open another browser tab and then copy and paste everything I want from the old design into a new one bit by bit. This way, I can adjust as I go.
To use: you can either copy and paste using regular computer shortcuts (Control+C then Control+V in Windows) or click the element you want to copy, then click on the 3 dots to use the copy and paste options presented there.
Remove backgrounds
You probably know about this feature but I’ve included it because I use it all the time.
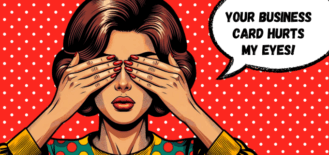
I often use the same pop art image of a woman with a microphone. You may have seen her on my social media channels and I’ve also used her in the featured image of this post.
In order to create multiple different designs using the same image, I remove the background and then duplicate the design changing the background colour (and sometimes the text) of each one.
As you can see in the collated image below.
Sometimes I use colours from her dress but normally I want a vivid eye-catching contrasting background and this allows me to do that.
I should mention that the background remover feature isn’t 100% perfect and occasionally leaves some of the background intact.
Sometimes I cover this with a geometric shape in the same colour, save it to my computer then re-upload this new “fixed” design but sometimes I curse, give up and use a different image.
To use: click your image, select Edit Image from the top menu then click Background Remover.

Use the filter feature
This is a great way to find what you need more easily. For example, you can filter out Canva Pro paid elements or look for images in a specific colour.
To use: click on the aspect you need in the sidebar (Templates, Elements, Photos, Videos etc) and then click on the Filter icon in the white search box. From there you can narrow your search down further.
For example, you can go to Elements, select a heart shape and then set the filter to only show free, blue hearts.
Use the colour picker
This was a bit of a game-changer for me. I’d been using Color Picker Online until I spotted that Canva had its own version – DOH!
The colour picker feature is great when you want to use a particular colour within an image in another part of the design – for the background or text, for example.
There are 2 ways of doing this:
- Upload an image or select a template then click the colour box in the top menu (the square with a mix of colours in it) and then scroll down until you see Photo Colours. You will then see a row of the main colours contained within that image.
- Upload an image or choose a template then click the colour box in the top menu. Select the + symbol under Document Colours on the left, click the pipette icon and then drag it over the design to find the colour you need.
Lock the design
The lock feature is useful if you’re working on a design and you want specific elements to stay in place. An example would be if you’re working on a client’s design and you want to make sure you don’t accidentally change specific parts of it when overlaying elements.
To use: Click on the element you want to lock then click on the padlock icon at the top right-hand corner of the screen.
Tidy up
The tidy up feature is handy if you have bullet points or elements that are out of alignment and you want them all to QUICKLY fit neatly under one another without having to adjust them individually.
To use: highlight the elements that need aligning, click Position (in the top toolbar) and then select Tidy up from the options.
Erase shizz
Previously, when I wanted to cover up part of an image I just overlaid a square or oval of the same colour. Now, you can actually scrub out the unwanted part completely.
To use: Click on your design, select Edit Photo and then choose Magic Eraser. It’s not always 100% perfect but it’s pretty close.
Change items in an image
This is a weird one, but you can now click on a bunch of flowers in a bowl (as an example) and magically change them for oranges!
To use: Click on your design, select Edit Photo and then choose Magic Edit. Then brush over the section you want to change, press Continue, describe what you want to use instead, click Generate and then choose from the options you’re presented with.
Reverse an image
I LOVE this feature because I often have a pic I want to use in a social media post or an email header but I want the image to be on the other side of the design.
I still think this feature is kinda like witchcraft.
To use: click on your design and then select Flip in the top toolbar.
Save your favourite elements
If there are elements you use over and over again (I use lines, squares and speech bubbles a lot) you can ‘Star’ them to access them faster.
To use: find the element you want and hover your mouse over it, click the 3 dots, then select Star. The element will be saved to your Starred folder in the main left-hand sidebar
Use the fine-tune alignment
When you want to move a text box or an element in a design you usually grab it with your cursor and drag it to where you want it, right?
This method usually works fine but sometimes I have text I want to put in a really small box and I can never quite get it centred just right. I used to fiddle around with it for AGES before I discovered this hack.
If you use your laptop’s arrow keys you can move the text/element a teeny amount and get it exactly where you want it.
To use: Click the element you want to move then use the arrow keys on your laptop to move it one pixel at a time. You can move it 10 pixels at a time if you also hold down the Shift key.
Use Canva’s Magic Shortcuts
If you hit the / key on your computer when your cursor is on a design (or empty design), it brings up a handy shortcut menu with various options such as adding text, logos, graphs, lines, tables, videos and photos etc.
Create physical merchandise
Possibly one for your clients, but you can also design physical items in Canva including journals, calendars, stickers, tote/paper bags, bookmarks, notebooks, mugs, magnets, sweatshirts, hoodies and T-shirts.
To use: from the main Home page, click on the big blue Create a Design button and then type the name of the item you want to make (“mug”, “bag” etc) in the search box. A new tab will open and you can start creating your product.
Note: Canva has content licensing rules around using the platform to create and sell physical products that you can read here.
Animate all or part of a design
I don’t use this feature as much as I should tbh but it’s a fantastic way to ensure your content stands out from the crowd on social media.
You can either use one of Canva’s animated templates or you can choose to animate a specific part of your design. Animated designs are a great way to show a project’s progression or to create before and after posts for social media.
Canva even has a music library of free licensed music you can add.
To use: Click on the element within the design you want to animate then select Animate from the top menu. You will then see various (really fun) motion effects to choose from. I’ve made a super simple one for you to see below.
Record your screen (and/or yourself)
Recently I realised you can use Canva to record your screen which is a great way to quickly make how-to tutorials for your clients.
I made a load of these tutorial videos in Loom when I first took on my own VA and then added them to a shared Drive folder so she (or future VAs or even her associate) could refer back to them later.
Seeing as this feature is included in my subscription, it makes sense to make my screen share videos in Canva now instead!
To use: click on a new design then click Uploads in the main left-hand sidebar and you will see ‘Record yourself’ as an option under ‘Upload Files’. You then choose whether to record just yourself, just your screen or both together.
Create a website
I can’t tell you how to do this yet because I haven’t fully tested it out – I just wanted to mention it so you knew it existed.
Although I plan on recording a comprehensive video tutorial on how to create a website in Canva so I can add it to my free website set-up course, if you want to take a look at this feature in the meantime, you can do so here.
Managing client work in Canva
Because you can do so much in Canva, most Virtual Assistants will use it at some point for at least one of their clients as well as for their own shizz.
And Virtual Assistants who offer social media as a service will use Canva for sure.
There are two ways of creating designs for your clients in Canva.
- The client adds you as a team member in their own account and you create their designs there.
- You create the client’s designs in your own account.
The first scenario is the most common because you need the Canva For Teams subscription to add additional users to your account.
Using the client’s account also means they have full access to their designs and they pay the invoice!
The second scenario isn’t unheard of but then only you can see the client’s designs and you have to transfer them to the client should you ever stop working together.
One way around this is for your client to use Canva Pro and give you their password so you can log in as them… I didn’t tell you that though!
Conclusion
Well, that was a whopping great post but I hope you enjoyed reading it and gained some value from it. As mentioned, I love Canva and I use it pretty much every day and for 100 different things.
It was hard to know what to include in the post and what to leave out, tbh.
What might be a totally unobvious feature to me might be a frequently-used “well, duuuur” feature to you!
I literally could have made this post twice as long but I decided to focus on the features I use most often and fab ones I only recently found out about and therefore, assumed you may not have spotted.
I also could have made a Canva Tips YouTube video but I thought a blog post would be easier to update should Canva ever change the layout of the platform or retire some of the features later on.
Additional Canva resources
- Here’s an article on how to get the most out of Canva.
- This is a comparison chart comparing the free and paid versions of Canva so you can see what you get for your money.
- Here’s Canva’s article on logo design and why it matters.
- I also have a blog post on things you need to consider when designing a logo for your Virtual Assistant business.
![]() |
Wanna level up your VA business?Average VAs just coast but truly great VAs constantly look for ways to improve their business. If you want to take your business from good to great and from great to OMFG, you’re the perfect candidate for my All Stars membership group. |
Great post! I was reading about how to work with clients in Canva and I’d like to mention that I use a different option.
Many of my clients don’t have a Canva account, so I set up a free one for them when we start working together. I do all their work there, to keep my own Canva tidier.
If they ever stop working with me, I don’t need to worry about what happens with their designs: all their work is there, they own the account and they can use it whenever they want (if they ever get to learn how to use it).
You can also enable the ruler function and then drag from the top to create lines (when you need things to appear in the same place, and it carries over into multiple slides. Also you can just drag it off the tile to get rid of it. It was a major time saver for me. Also the show margins is nice to have as well.
This is so helpful for me right now Jo. I have the free version and managed to design some decent business cards but I now want to design my invoices too so may think about upgrading. It is a little addictive!
It is sooooo addictive!!